www.hopetech.com
HYDRAULIC DISC BRAKE SYSTEM
INTRODUCTION
WARNING
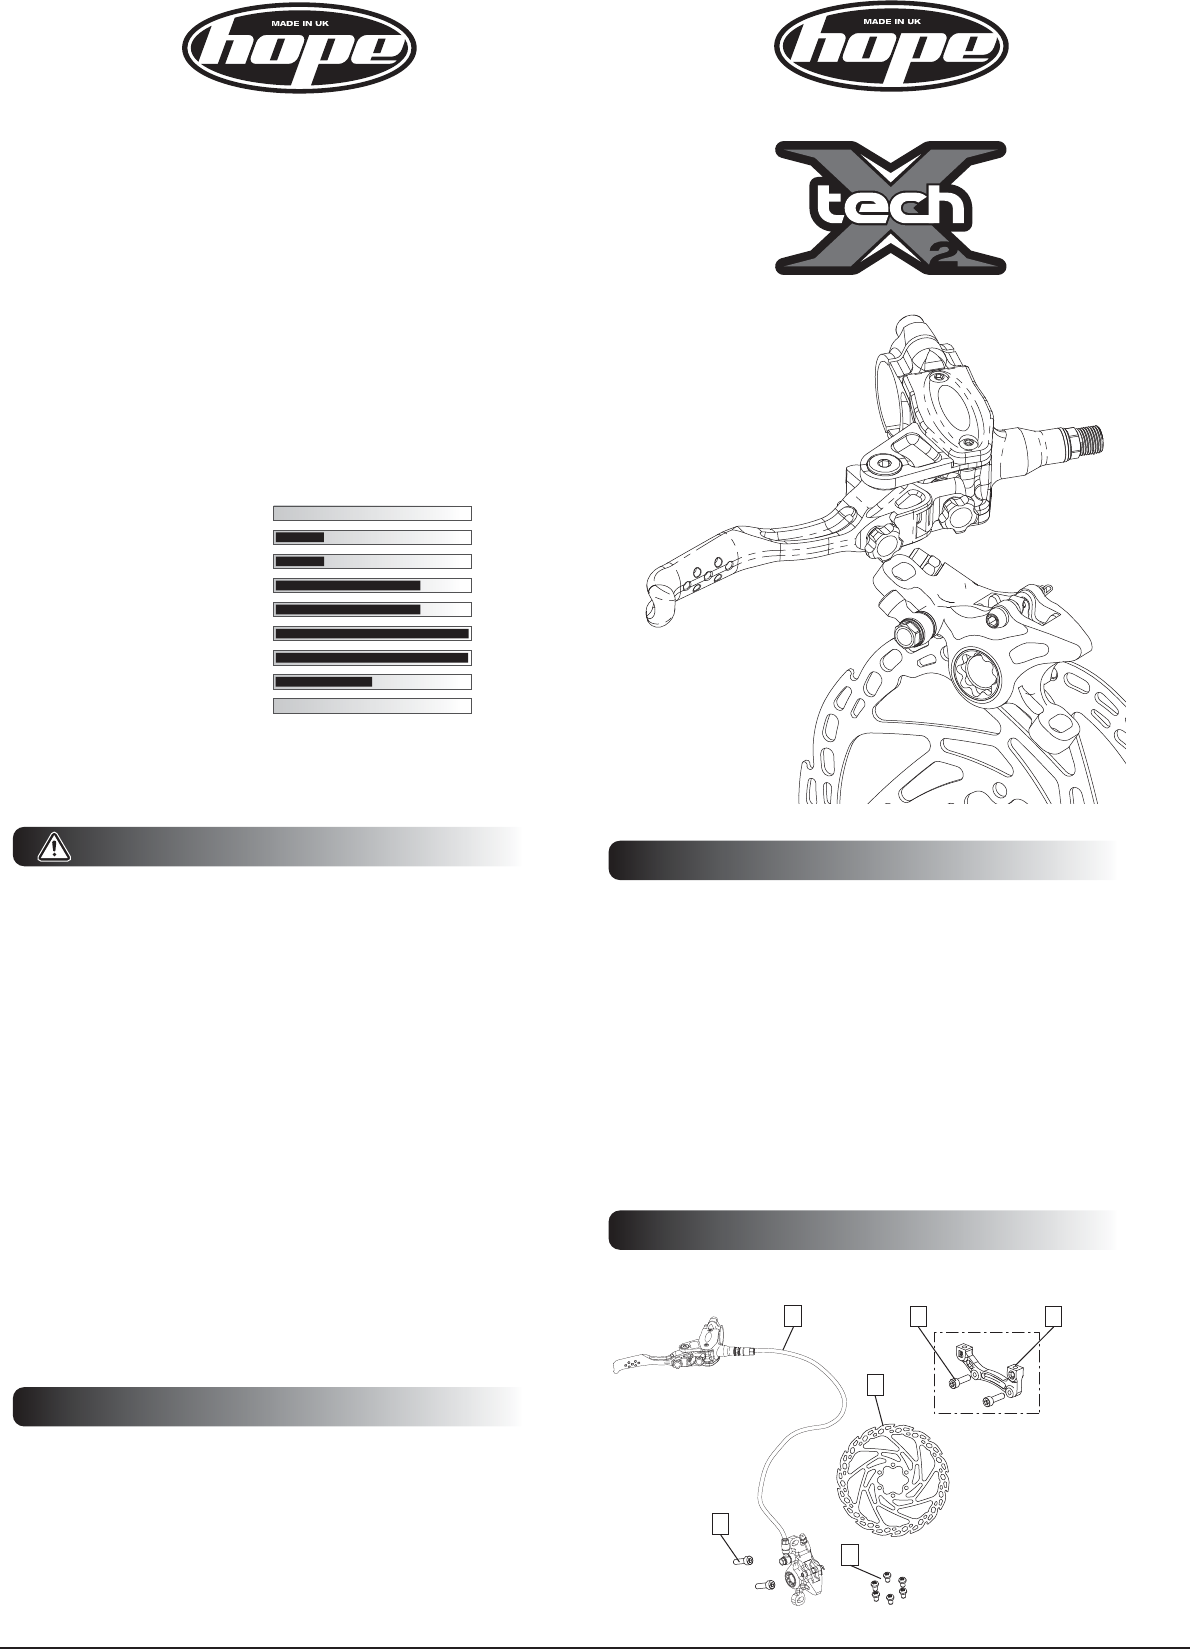
1. Brake system, fully bled
2. M6 x 18mm caliper bolts
3. Rotor (φ160mm, 6 bolt
shown)
4. Disc bolts, M5 shown
5. Adaptor bracket
(if required)
6. M6 x 18mm adaptor
bracket bolts (if required)
1
2
3
4
56
QUICK INSTALLATION
GUIDE
Congratulations, you have just acquired the highly versatile and powerful TECH X2
hydraulic disc brake system. From XC to All Mountain, this brake will perfectly suit
your riding style.
The TECH master cylinder has been designed to make your riding even more
enjoyable. The new cinematic will give a smooth and progressive feel. With the finger
reach and bite point adjustments, you can be sure the lever will feel comfortable to
use. It also features a split clamp for easy fitting, ambidextrous design and integrated
reservoir for easy bleeding.
The one piece X2 caliper is machined from a solid billet of aircraft spec aluminium.
The caliper is designed to offer power and stiffness. As the caliper is PostMount type,
depending on forks, frame and rotor size, an adaptor bracket may be required.
The rotors are available from Ø140mm to Ø183mm, for IS fittings but also the HOPE
Pro3 SP-XC3 and Pro3 SP-AM4 hubs.
Please bear in mind that this brake system hasn’t been designed to be used in harsh
alpine conditions.
BOX CONTENTS
· Don’t overestimate your technical capacities. This brake system must be
fitted by a competent cycle mechanic using the correct tools. Incorrect installa-
tion could result in brake failure that could cause serious or fatal injuries.
· This brake system has been designed to be used only on two-wheel
vehicles with human propulsion. Any other application is not advisable and
could result in the failure of this product.
· Your brake system will generate heat during braking. Never touch either
the disc or caliper after long braking period as this could cause severe burns.
· Before each ride always check the brake for proper function, the brake pad
for wear and that there is no system damage resulting in fluid leaks.
· It’s common sense to also check that your wheel’s quick release systems are
securely installed and tightened.
· Your braking performance will improve in almost all conditions. Please take
time to become familiar with your new brake. Always ride within your own
ability.
· Brake pad contaminated with brake fluid, chain lubricant or unsuitable
bike cleaner will need replacing because the overall brake performance will be
greatly diminished.
· Please refer to the website videos and technical documents for more
information including servicing and maintenance - www.hopetech.com
· If you have any doubts or questions please contact your dealer or the
appropriate distributor for your country.
· If you decide to ignore these important safety warnings and instructions,
you are doing so at your own risk and Hope Technology cannot be held respon-
sible for any consequences resulting of the misuse of the brake system.
TOOLS REQUIRED
Once again, don’t overestimate your technical skills. If you are not familiar with
this sort of installation we advise that this brake system should be fitted by a
competent cycle mechanic.
. Torx T25 driver (if fitting 6 bolt rotor)
. 5mm Allen key
. 4mm Allen key
. 8mm spanner
. Flat blade screw driver
DOWNHILL
FREERIDE
ALL MOUNTAIN
TRAIL
ENDURO
CROSS COUNTRY
XC RACE
TRIALS
ROAD
N/A
Usage chart :
HOPE TECHNOLOGY (IPCO) LTD
Fernbank Mill
Fernbank Avenue
Barnoldswick, Lancashire
BB18 5UX, United Kingdom
Technical enquiries : Sales enquiries :
tel: 00 44 (0) 1282 818 413 tel: 00 44 (0) 1282 851 200
 (39 pages)
 Manymanuals.com
 Manymanuals.de
 Manymanuals.fr
 Manymanuals.it
 Manymanuals.pl
 Manymanuals.cz
 Manymanuals.es
 Manymanuals-pt.com
Comments to this Manuals